GitLab Integration
Rapticore Integrates with a customer’s GitLab instance using a Personal Access Token.
Rapticore only integrates with GitLab Cloud, currently.For more information, refer to our GitLab integration reference.
Setup
Setup involves:
- Creating a Personal Access Token in GitLab
- Configuring Rapticore to integrate with GitLab
GitLab privileges
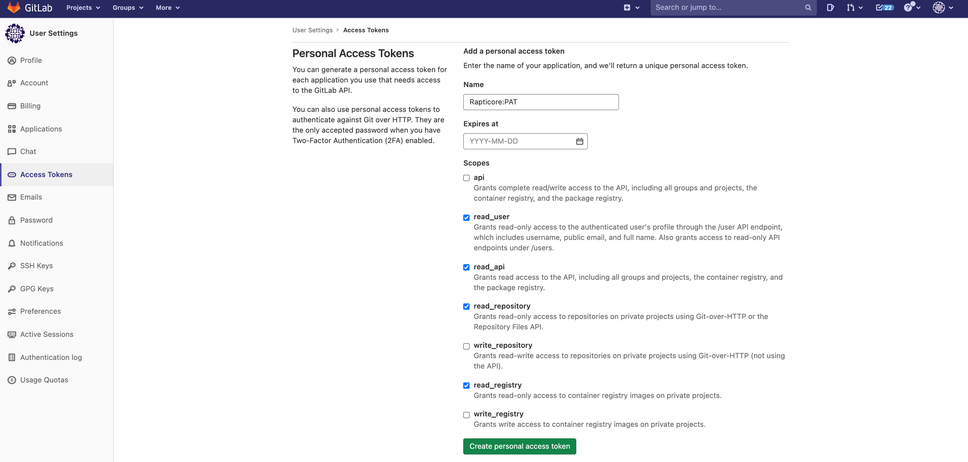
You must have GitLab organization rights to create personal access tokens with read_user, read_api, read_repository, and read_registry permissions.
As a best practice, Rapticore recommends that the integration user is tied to a service user.
Rapticore privileges
You must have an Admin role to configure GitLab integrations in Rapticore.
Creating a personal access token
- Log in to gitlab.com/yourcompany with the email address of the user
- Go to User Setting by clicking the user avatar in the top right corner
- Select Edit Profile

- Click Access Tokens from the Left side panel

-
Enter a name for the Personal Access Token
-
Select
read_user,read_api, read_repository, andread_registrycheckboxes and Click create personal access token

- Copy the personal access token

If you lose the Personal Access Token simply follow the steps to re-create a new one.
Configuring Rapticore
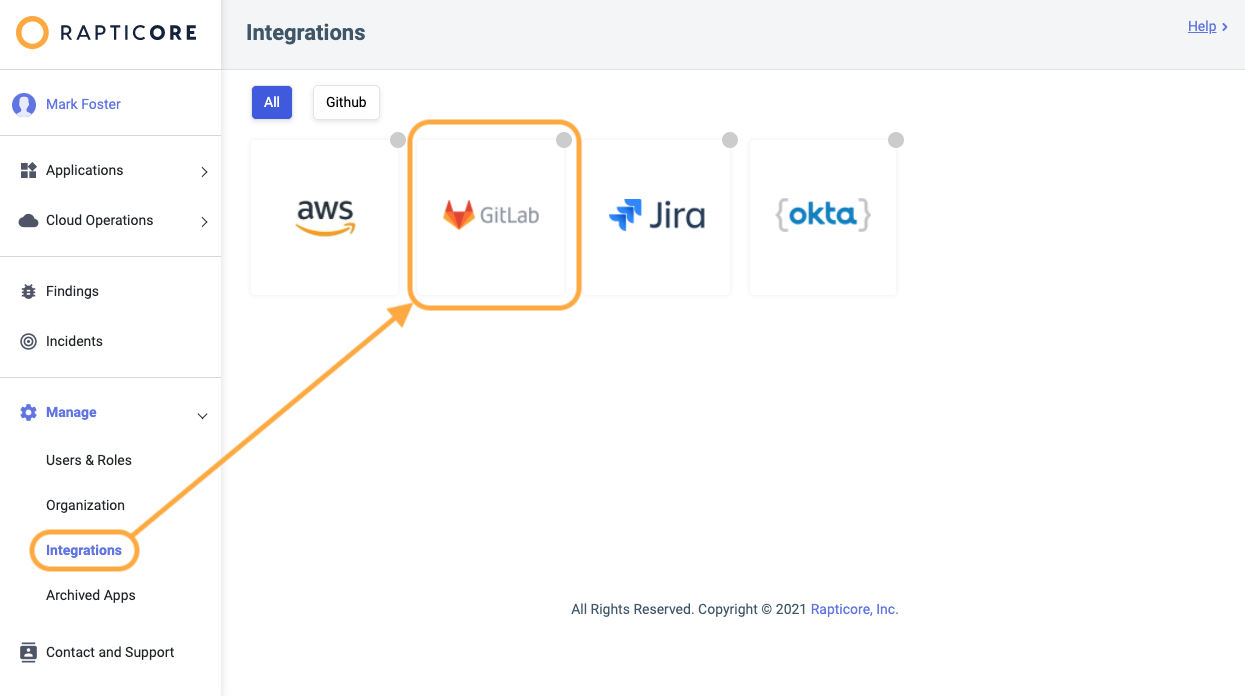
- Login to Rapticore as an admin user and navigate to the Manage > Integrations page and select the GitLab integration

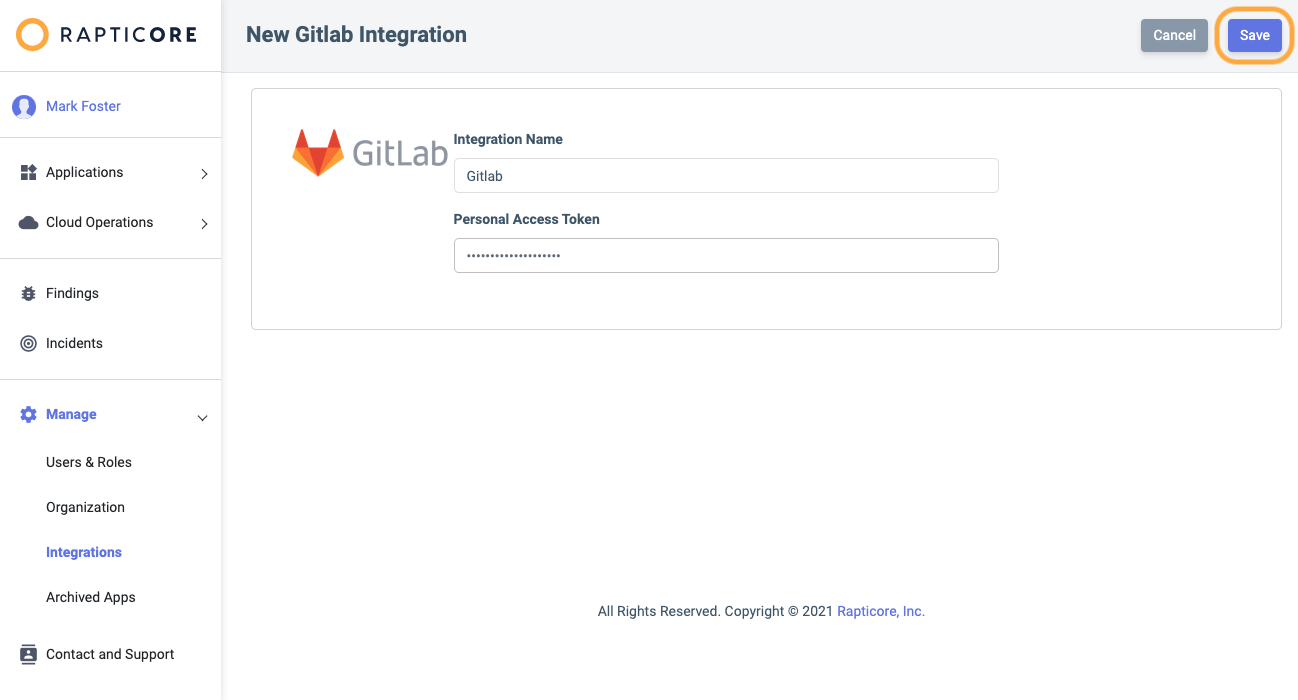
- Enter the personal access token created above in the API key field and click Save.

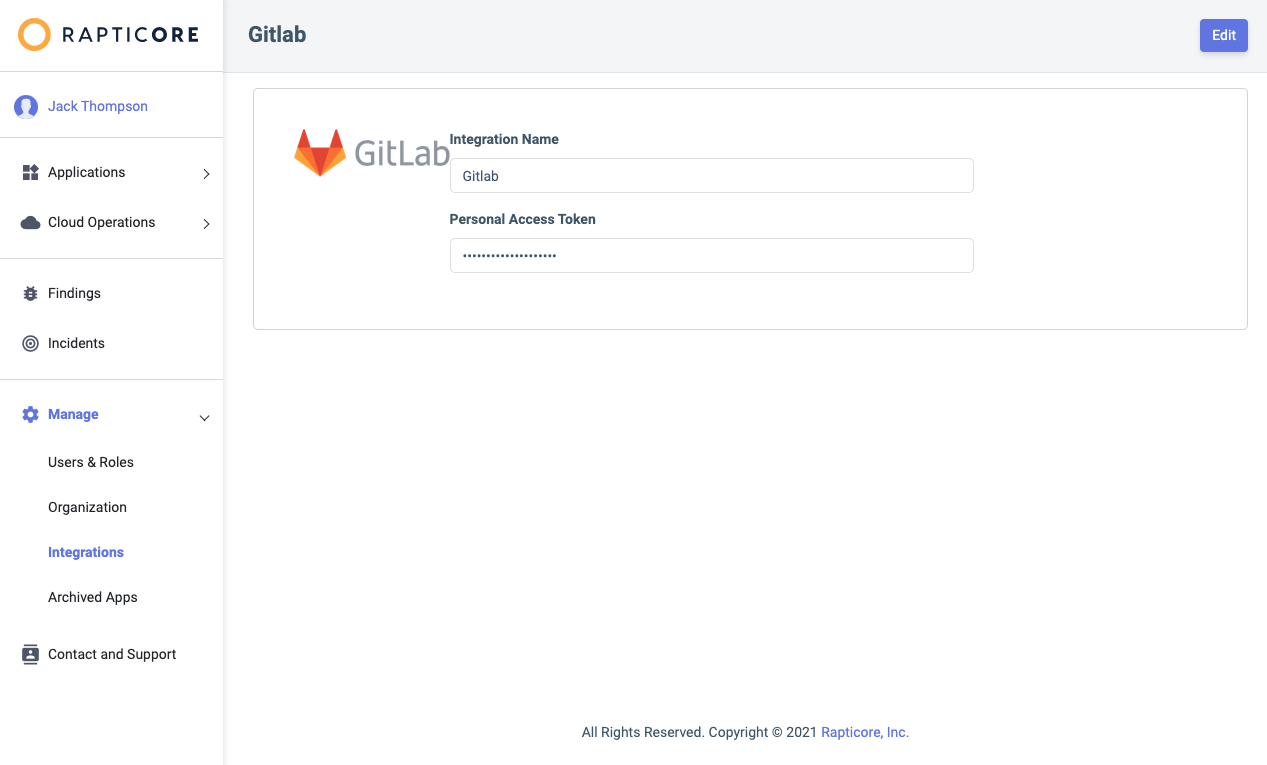
You will then see the created integration.

Once completed, you can navigate to the Applications > Repositories page in Rapticore and view your integrated Github repositories.
GitLab repositories are tracked by an asynchronous process, so it may take a few minutes for the them to show up in the Repositories list.
Updated about 1 year ago