Jira Integration
Rapticore Integrates with the customer’s JIRA instance using an API Token.
Rapticore only integrates with Jira on Atlassian’s Cloud.For more information, refer to our Jira integration reference.
Setup
Setup involves:
- Creating an API Token in Jira
- Configuring Rapticore to integrate with Jira
- Selecting Jira projects to use in Rapticore
Jira privileges
The user associated with the API Token should have access to Jira projects where the customer wants backlog items created.
As a best practice, Rapticore recommends that the integration user is tied to a service user.
Rapticore privileges
You must have an Admin role to configure Jira integrations in Rapticore.
Creating an API Token
- Login to Atlassian Cloud with the user credentials
- Navigate to the API Token creation section of your account security settings https://id.atlassian.com/manage-profile/security/api-tokens
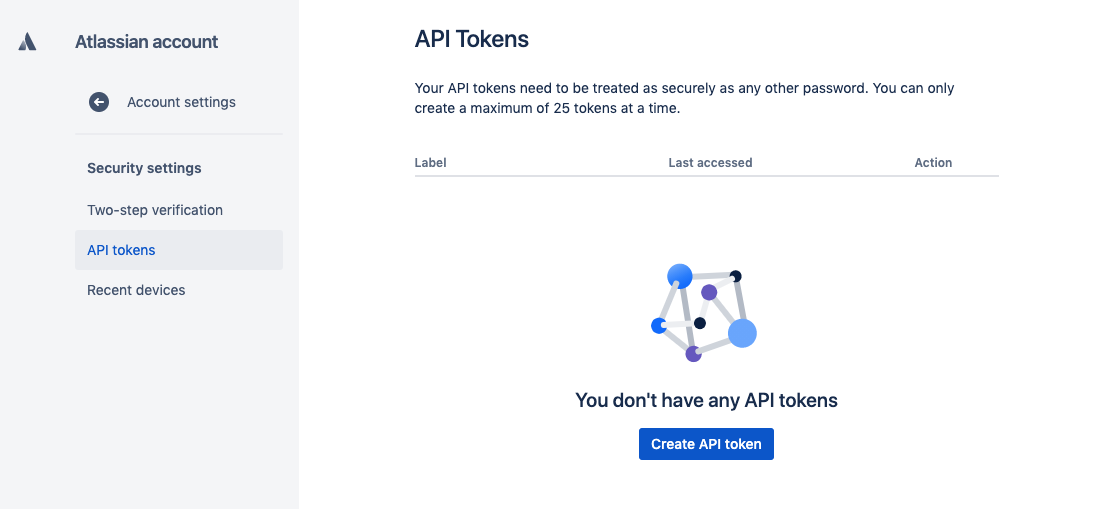
If you lose the API token simply follow the steps to re-create a new one.
Configure Rapticore
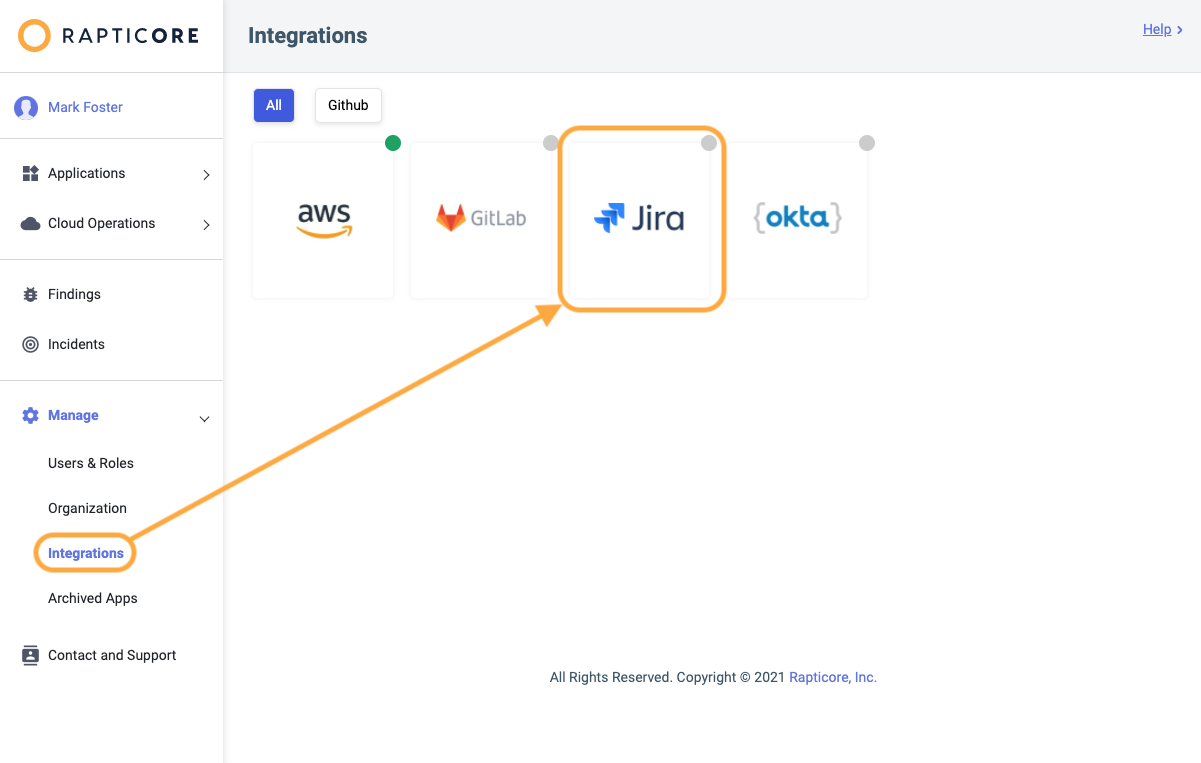
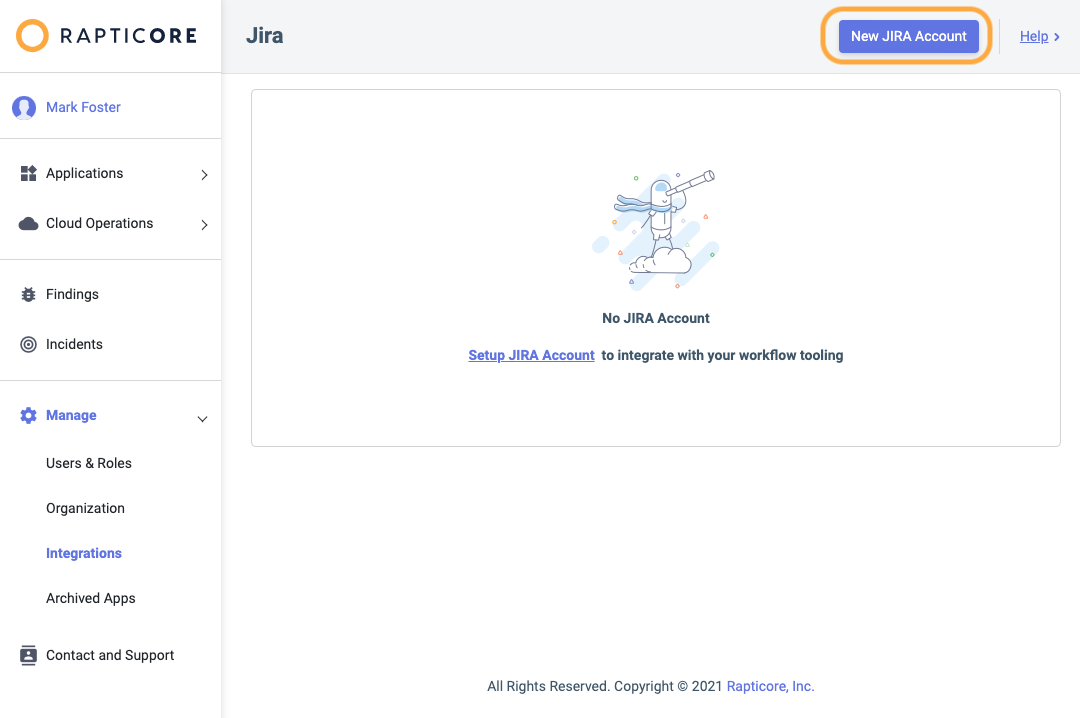
- Login to Rapticore as an admin user and navigate to the Manage > Integrations page and select the JIra integration and click New Jira Account
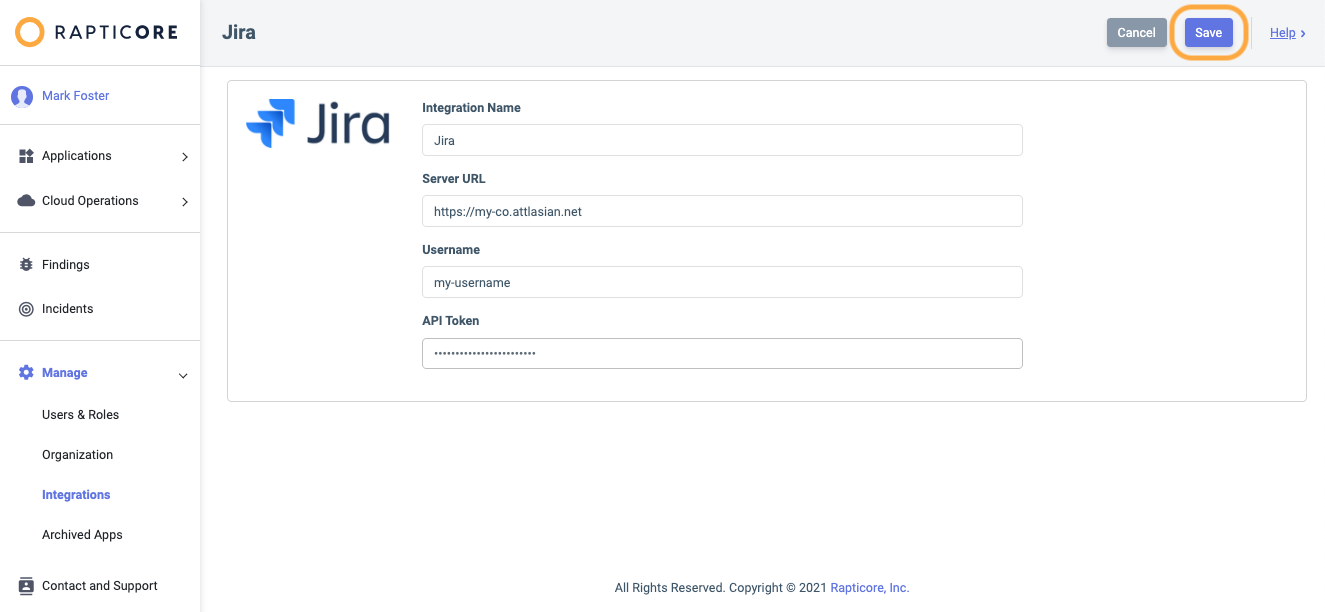
- Fill in the following details and click "Save"
- Server URL: the unique URL of your Jira Atlassian Cloud, e.g. https://my-co.atlassian.net
- Username: username of the user associated with the API token
- API token: the API token created in the above steps
Configure Jira Projects
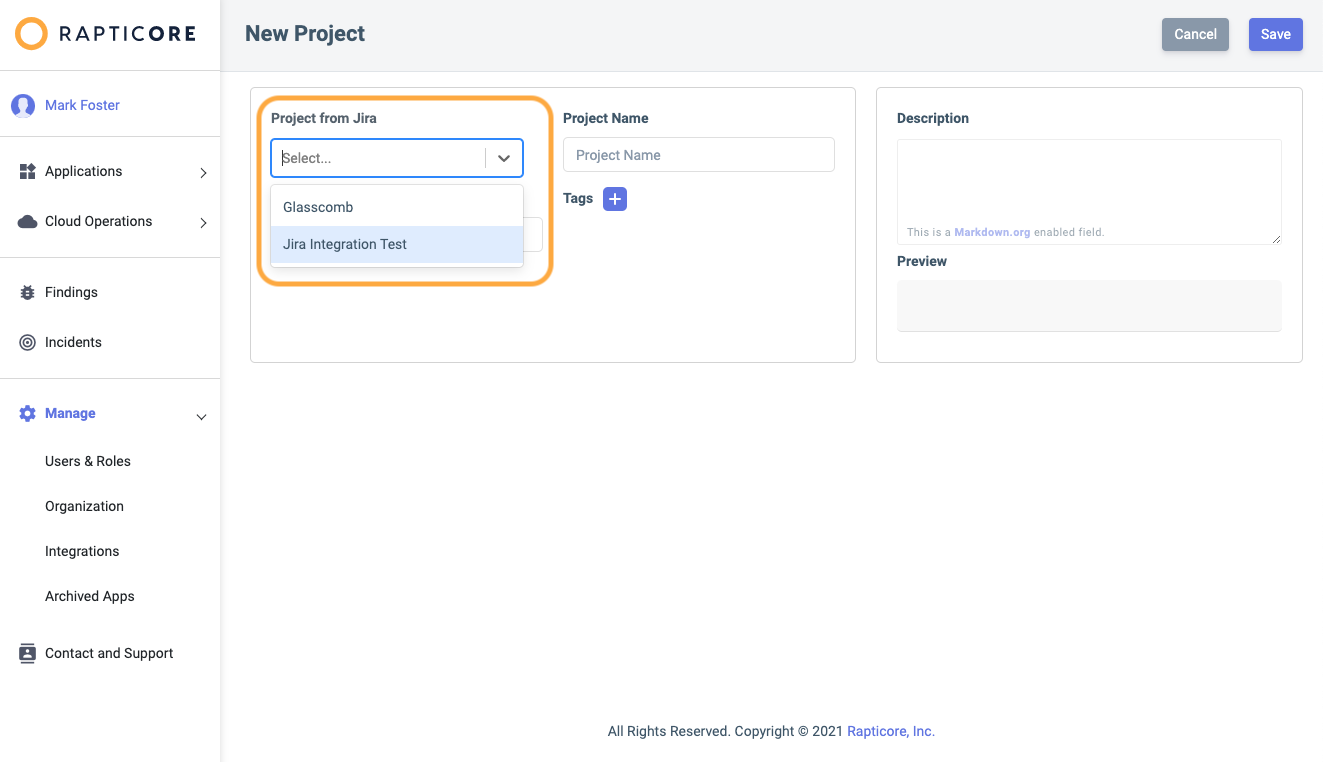
- Click New Project and select the Jira project you integrate with Rapticore.
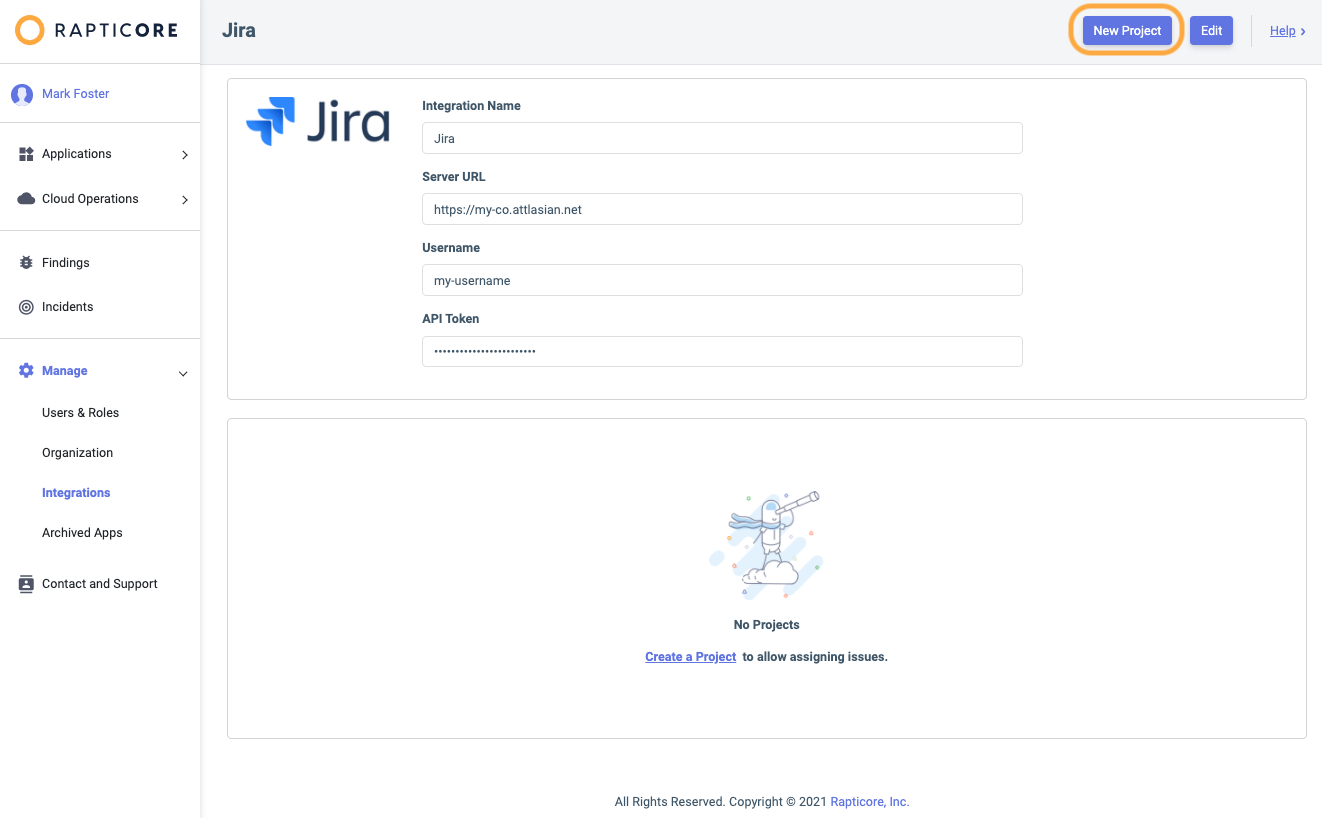
- Pick a project from your Jira Account
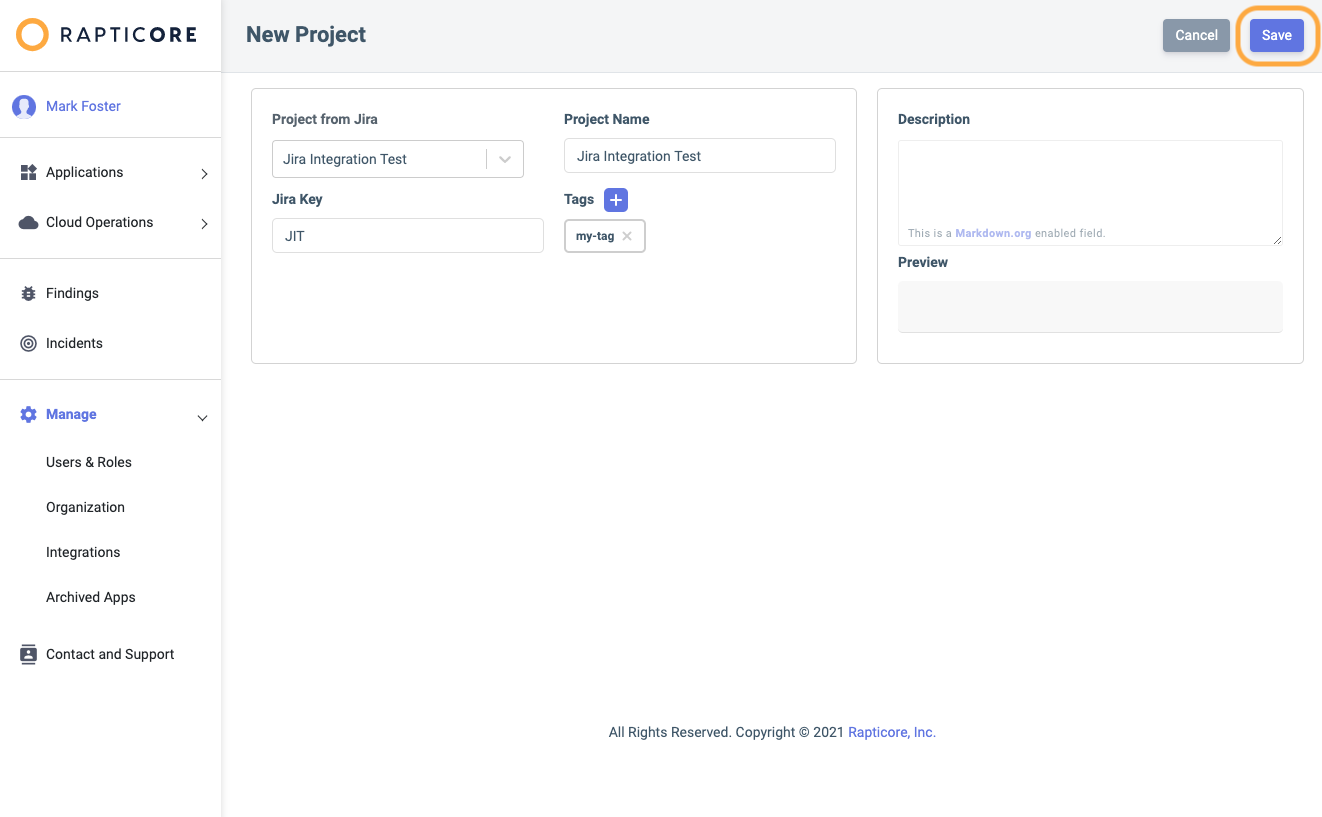
- Optionally enter Tags and Description for the Project and click Save.
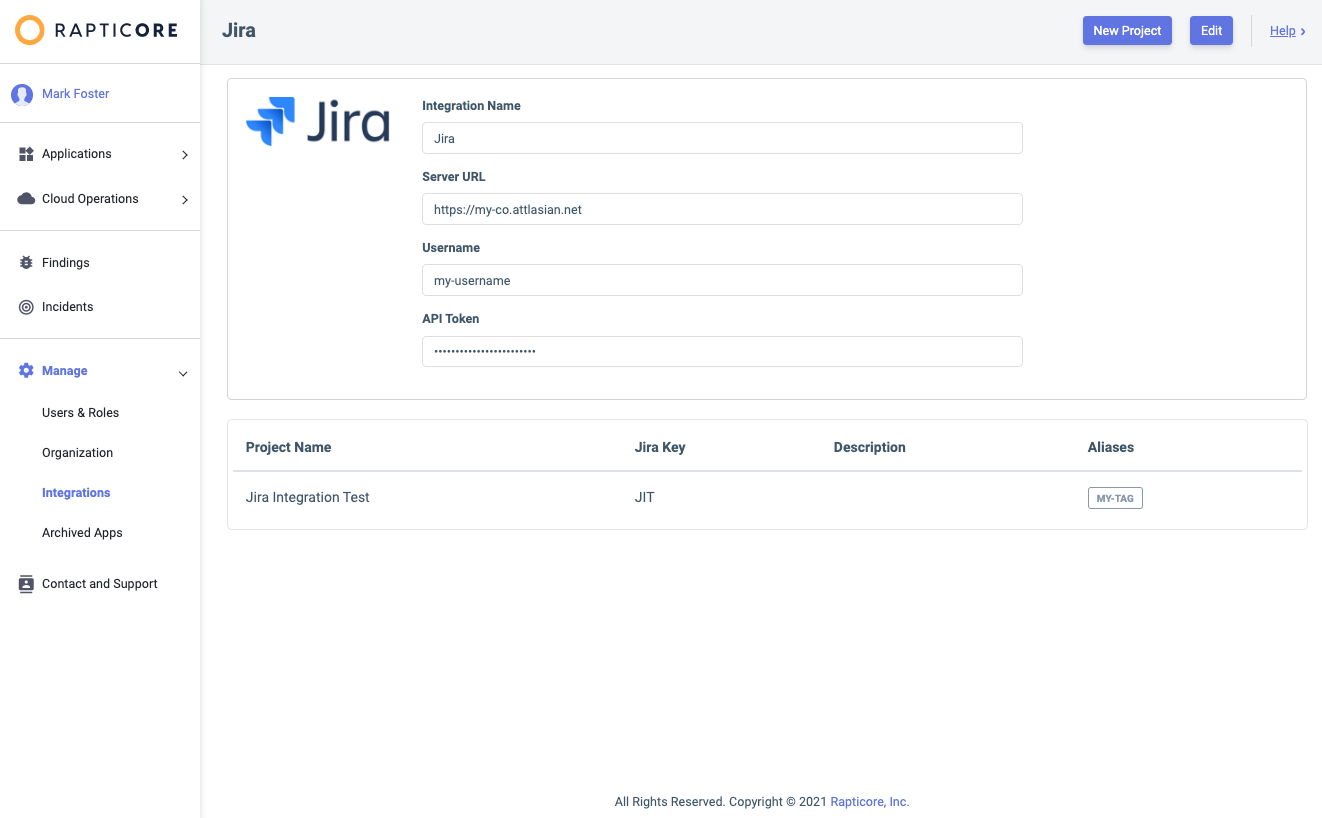
Repeat these steps for as many projects you wish to integrate with Rapticore.
Updated about 1 year ago
What’s Next